In our current spring magazine, and for the first time in our 16-plus year history, we’ve looked at gluten free brewing in major detail – from why GF beers have blossomed in popularity to what goes in to making them whilst providing the likes of a Helles Lager and Black IPA recipes for you to try at home. So it only made sense to get our resident guru of home brew John Palmer – who has recently developed his own sensitivity to gluten – to break GF brewing down succinctly as well as get him to dish up one of his own recipes. Even if you’re not sensitive to gluten, you probably know someone that is and that they’d no doubt thoroughly appreciate something crafted especially for them. So, what are you waiting for – get brewing!
Why have we brewed with barley and wheat for thousands of years? Because it worked. The key to creating fermentable sugars from starchy cereal grains is for the gelatinisation temperature of the particular starch to be lower than the denaturing temperature of the intrinsic amylase enzymes, and that is indeed the case with barley, wheat and rye. Naturally fermented beverages can be made, and were made, from other grains as well, and thus we have chicha (maize beer) from South America and sake (rice beer) from Japan. However, the gelatinisation temperature (ie. when the starches become water soluble) for those grains are higher than the upper temperature limit for the amylases, and therefore you need external (exogenous) enzymes (from your saliva) in the case of chicha or fungal-created enzymes for sake to do the job of converting these starch sources into fermentable sugars for yeast to act on.

Go with the flow
So, let’s suppose you are experiencing symptoms of gluten sensitivity – stomach cramps and/or loose smelly stools within hours of having, for example, beer and pizza. It could have been due to an unwashed, undercooked pizza topping, lactose intolerance from the cheese, or it may be gluten sensitivity. Gluten, by the way, is the common name for a primary storage protein in wheat. It is one of a group of similar storage proteins in barley and rye, and thus all of these grains commonly used in bread and beer will cause a reaction in gluten-sensitive people.
The reason(s) for increasing numbers of people becoming gluten-sensitive is not known. There are lots of theories, but nothing proven. So meanwhile, we adapt.
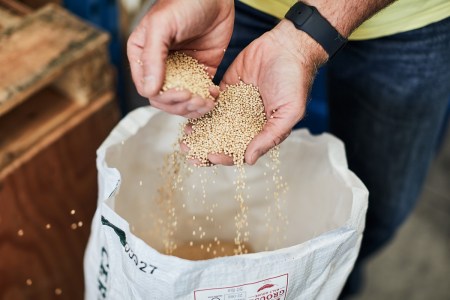
How can we make a tasty homebrewed beer that doesn’t contain barley, wheat or rye? Well, two answers are maize and rice. There are other common grains as well, chiefly sorghum, millet and buckwheat. The gelatinisation temperatures for these grains are listed in Table 1. Gelatinisation is the temperature where the starch granules in the grain are essentially “cooked” and become water soluble, enabling the enzymes to convert the starches into fermentable sugars.
Table 1: Gelatinisation temperatures of gluten free grains
| Barley | (56-62°C) |
| Buckwheat | 67-74°C |
| Maize | 64-75°C |
| Millet | 64-72°C |
| Rice | 61-72°C |
| Sorghum | 71-80°C |
Making fermentable sugars with malted barley is easy: you crush the grain, throw it in hot water at 65°C, stir, wait an hour and you have fermentable wort. Again, it works because the starches become water soluble within the working temperature range of the enzymes. This is not the case for the gluten free grains. The natural enzymes will be denatured (broken) by the time the starches become water soluble, which is why it doesn’t work. The answer to this dilemma is exogenous enzymes, like chicha and sake, but all you have to do is pour a bottle or tear open a packet; no drooling or mold required.
Exogenous enzymes
There are various enzyme products that are available commercially, although I must confess, I don’t know if they are readily available in Australia, nor if they are available in suitably small quantities. These products are listed in Robert Keifer’s excellent book Gluten Free Brewing (Brewers Publications, 2022) and I will list some of them here.
Before I do, there is one other consideration for good fermentation besides fermentable sugars and that is yeast nutrient, specifically free amino nitrogen (FAN). Most of the gluten free grains provide less than half of the necessary FAN levels that brewing yeast are adapted to from malted barley fermentations. Therefore, you not only need enzymes for starch conversion, but you also need other enzymes that will create the amino acids and other nutrients that yeast need. Or you could add a packet of yeast nutrient. The trouble with commercial yeast nutrients though is that they tend to be mainly one particular amino acid or nitrogen source rather than the cocktail that yeast actually prefer. You might want to add a bit of both nutrient and other enzymes to cover all the bases.
Table 2: Common US enzyme brands
| Product name | Function | Description |
| Termamyl | Conversion | All purpose high temperature alpha amylase, temperature stable up to 100°C for 15 minutes. |
| Ondea Pro | Modification conversion | Enzyme cocktail containing the “other” enzymes I mentioned above, but each having the usual enzyme temperature limits. Will work on a slowly rising step mash but works best with pre-gelatinised starch. |
| Sebamyl L | Conversion | An alpha amylase with a useful range of 60-71°C but denatured at 75°C. |
| Ultimase BWL 40 | Modification | Enzyme cocktail for viscosity reduction in the mash, especially for mashes using buckwheat and quinoa. |
| Fungamyl BrewQ | Conversion | Alpha amylase that is stable at 60-71°C and has increasing fermentability with the amount used, allowing tailoring of FG with experience. |
| Ceremix Flex | Conversion | Combines an alpha amylase with pullulanase (a limit dextrinase type). Often used in conjunction with Ondea Pro. Works well at 63-82°C. |
| AMG 300L BrewQ | Fermentability | A glucoamylase enzyme that can greatly improve fermentability in dextrinous worts. |
| Attenuzyme Core | Fermentability | An aggressive glucoamylase often used on a portion of the total wort. Must be denatured by wort boil. |
Mashing differently
This brings us to the actual mashing step. There are a couple ways to do this and the specific mash regimen depends on the combinations of the specific grains you are mashing. I don’t have room here to explain all that; that’s why someone wrote a book on it.
One of the most popular methods currently is the rising step mash where you use direct heat or sequential infusions to move the mash through the different beta-glucan, protein and saccharification rests. This method works best with exogenous enzymes to supplement the enzymes that your malts and grain may or may not have.
The following recipe is adapted from those given in Keifer’s book and it produces a gluten free American style ale. The recipe uses millet, corn and rice malts but could also use sorghum or buckwheat malts. The recipe construction is just like any other beer except that instead of one base malt you use several to help round out the flavours and body more than any single grain (besides barley) can. There are millet, rice and buckwheat specialty malts available such as biscuit, Munich, crystal, chocolate and black malts. I don’t know if they are available in Australia yet, but eventually I think they will be.
Keep in mind that you are not brewing with barley; the beer will not taste like a barley beer. However, it will taste similar and have a nice hop character. Essentially, these beers are their own styles, so it’s not an American pale ale with substituted grains, it’s an American rice ale (for example) – it’s its own thing.
This recipe has been aptly named as I have recently noticed I have become gluten sensitive.

Palmer’s Profanity Laced Pale Ale All Grain Recipe
(expected figures)
OG: 1.045
FG: 1.008
ABV: 4.8%
IBU: 20
Volume: 20 litres
Ingredients
1kg Pale Rice Malt
1kg Biscuit Rice (5L) Malt
1kg Pale Millet Malt (see note below)
1kg Yellow Corn Malt
75g Cascade hop pellets
Enzymes: 10 ml Ondea Pro, 10 ml Termamyl SCDS
Yeast Nutrient: 1g Servomyces (Lallemand) or Springferm (Fermentis) 10 minutes before end of boil
Yeast: American style dry ale yeast of your choice
Method
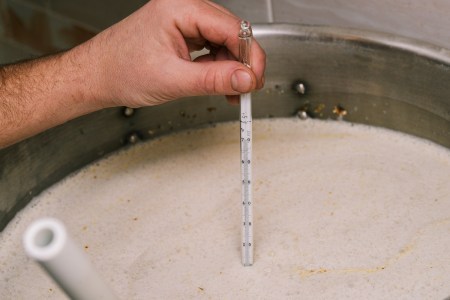
- Mash in 25 litres of water and the enzymes, and rest at 50°C for 20 minutes.
- Raise mash temperature to 70°C at 1°C per minute and hold for 45 minutes. Stir frequently.
- Raise mash temperature to 80°C at 1°C per minute and hold for 30 minutes. Stir frequently.
- Lift bag and drain. There should be 20 litres of wort.
- Bring to the boil and add 25g Cascade hops for a 60 minute boil.
- With 10 minutes left on the boil, add the yeast nutrient.
- At flame out, add 20g Cascade hops for a 30 minute steep.
- Aerate and ferment as usual.
- At end of ferment add 30g Cascade for 3 days prior to packaging.
Note: If millet malt is not available, you can substitute with 916g of Sorghum malt extract, added to the wort at the beginning of the boil.

John Palmer is the author of the bestselling home brew book How to Brew. In every issue of Beer & Brewer magazine he does a deep dive into a particular facet of brewing better beer and regularly provides one of his recipes. Subscribe to our magazine here.

